Idealpos supports different types of Surcharges.
Refer to the relevant section below for more information about the required Surcharge Type/Configuration:
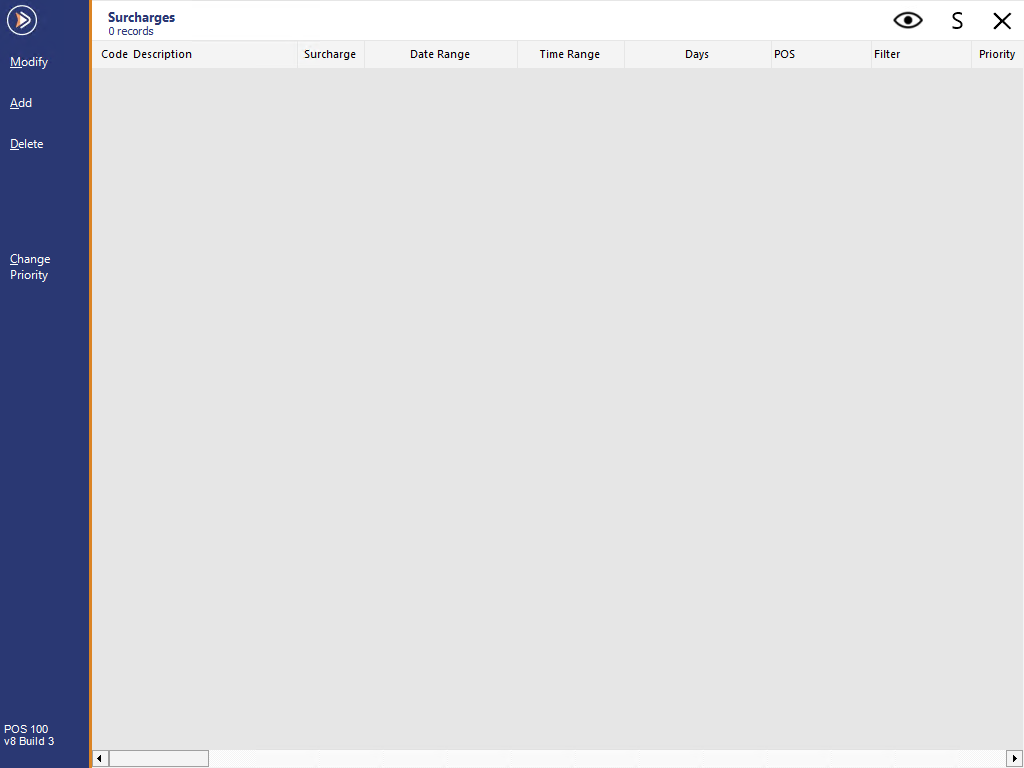
To configure Automatic Surcharges, go to: File > Sales > Surcharges.
The Surcharges window will appear and will contain a list of all the surcharges which have been configured.
If any surcharges were configured in an older build of Idealpos, they would have been migrated across to the new Surcharges window.
Depending on how those surcharges were configured (prior to upgrading to a new build of Idealpos containing this new functionality), you may have:
To create a new surcharge, press the "Add" button on the top-left corner of the window.

The Surcharges - "Add New" window will be displayed.
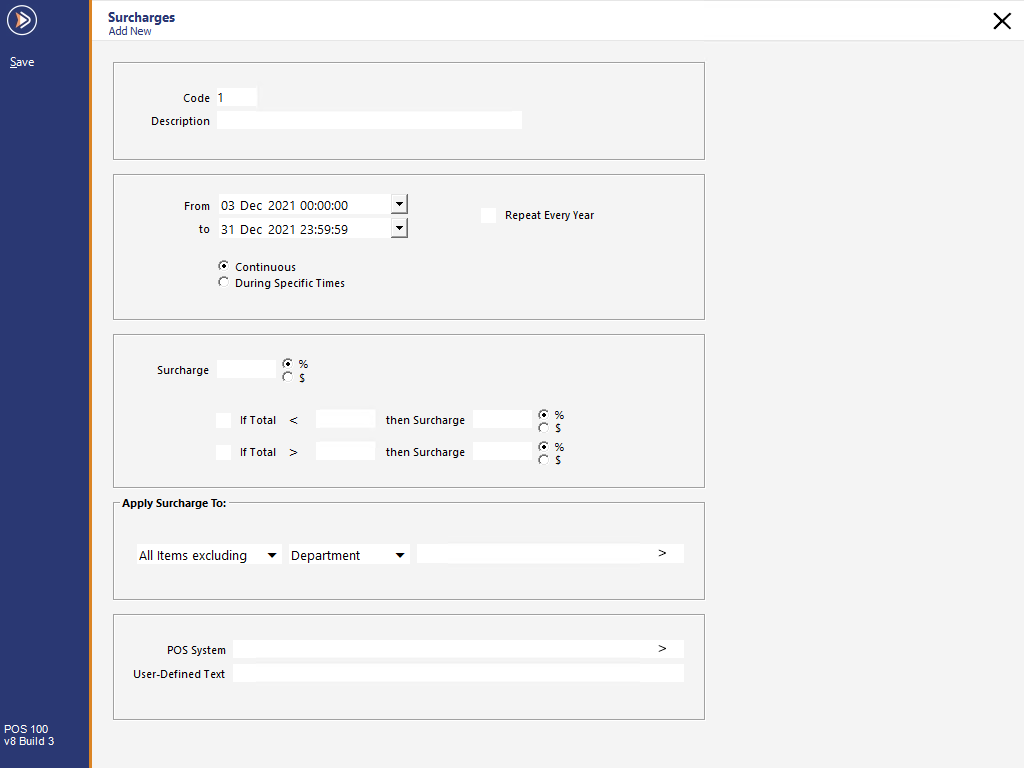
The Add New Surcharge window contains five sections which are outlined as follows:
This section is used to distinguish the surcharge from other surcharges and contains the following fields:
Code - The Code is automatically populated and increments by one each time a surcharge is created.
Description - Enter a description for the surcharge (e.g. Christmas Day surcharge, Easter Holiday surcharge, etc.).

This section is used to configured the period(s) which the surcharge will be active and contains the following fields and options:
From: This is the starting date and time for when the surcharge will begin.
To: This is the end date and time for when the surcharge will stop being active.
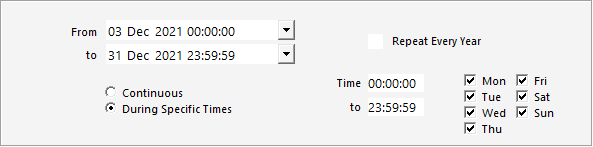
Repeat Every Year: This checkbox will enable you to repeat the surcharge each year. This can be used for cases when you need to apply a surcharge on a specific day or period each year. An example of this is when you want to apply a surcharge for a Public Holiday that takes place on the same day each year (e.g. Christmas Day or Boxing Day) and your business is generally open on the day.
Continuous: This option will trigger the surcharge to apply for the entire duration within the period configured in the From and To fields above.
During Specific Times: This option will enable you to further control the times which the surcharge will apply. By selecting this option, the following additional options will be displayed on-screen which can be used to control the specific times that the surcharge will apply.
Time: This is the start time that the surcharge will apply.
To: This is the end time that the surcharge will apply.
Day of the week checkboxes: There is a checkbox for each day of the week (Monday, Tuesday, Wednesday, Thursday, Friday, Saturday, and Sunday). The surcharge will only apply on days which contain an enabled checkbox.

This section is used to configure the surcharge amount/rules and contains the following fields:
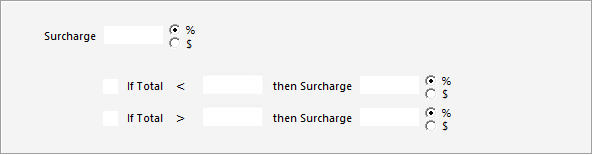
Surcharge amount and %/$ - The entered value and surcharge type (i.e. % or $) will be used as the flat surcharge rate when the total sale amount does not fall within the boundaries configured in the "If Total <" or "If Total >" settings that are configured below.
If Total < amount then Surcharge amount %/$ - If the checkbox is enabled and the sale total is less than the amount configured, then the entered surcharge amount and surcharge type will apply.
If Total > amount then Surcharge amount %/$ - If the checkbox is enabled and the sale total is greater than the amount configured, then the entered surcharge amount and surcharge type will apply.
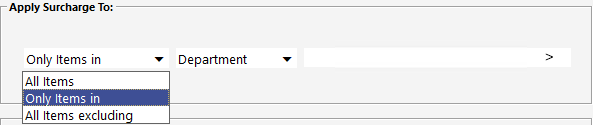
This section enables you to control which items the surcharge will apply to and contains the following options:
All Items - The surcharge will apply to all items that are added to the sale.
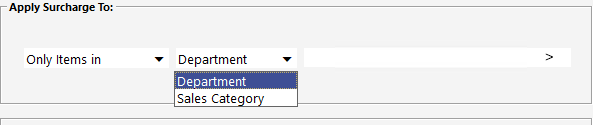
Only Items in - The surcharge will only apply to items in the sale that are in the selected Departments or Sales Categories. You can only select either Sales Category or Departments. Once a selection is made, the ">" button in the blank field can be pressed and Idealpos will display a list of Sales Categories or Departments. Multiple Sales Categories or Departments can be entered, ensuring that they are comma separated.
All Items excluding - The surcharge will apply to all items that have been added to the sale, except for items that are linked to the Departments or Sales Categories that have been configured. Again, multiple Sales Categories or Departments can be entered, ensuring that they are comma separated.

This section enables you to control which POS Terminals the surcharge will apply to.
POS System - Enter the POS Terminal numbers that you want the surcharge to apply to. The ">" button can also be pressed to display a list of POS Terminals and from there, you can select the required terminals from the list and press "OK" to ensure that the surcharge will apply to the terminal.
Customer Type - Enter the Customer Type Codes to apply or exclude from the Surcharge. Customer Type Codes can be entered as a range (e.g. 1-5), a comma separated list (e.g. 1,2,3) or as a combination of both (e.g. 1,3-5)
Exclude - This checkbox will control whether the Surcharge will apply to the selected Customer Types or be excluded from the selected Customer Types.
NOTE - The state of the Exclude checkbox will affect whether the Surcharge applies to non-Customer sales when the Customer Types field contains Customer Type Codes.
E.g. If Exclude is unchecked and Customer Types have been specified, the Surcharge will not apply to non-Customer sales.
If Exclude is checked and Customer Types have been specified, the Surcharge will apply to non-Customer sales.
User-Defined Text - This is an advanced feature that enables further control or manipulation over the surcharge function.

Once a surcharge has been configured, it will apply during the specified time(s) to the specified items.
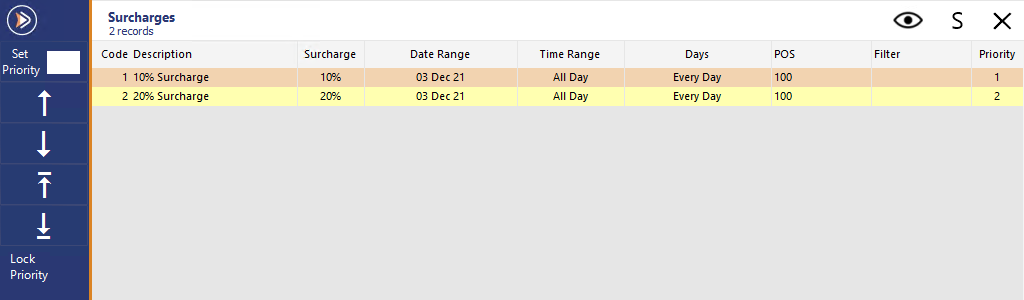
When creating surcharges, they will simply be added to the bottom of the list of surcharges.
Surcharges are applied to a sale based on the priority, meaning that any surcharge which appears higher in the list will be applied first.
Therefore, it is important that you ensure your surcharges are prioritised accordingly.
E.g. If there are multiple surcharges configured which are active at the same time, the surcharge that has the highest priority (appears higher in the list) will be applied to the sale first.
E.g. If you create two surcharges that are both active in the same period and apply a different surcharge rate to all items, the surcharge rate that has the highest priority will be used.
It should also be noted that depending on the type of surcharge configured, it is possible for multiple surcharges to be applied in the same sale.
E.g. if you have a 5% surcharge configured to only apply to items in a particular Department (e.g. Coffee), and you also have another surcharge (e.g. 10% surcharge) configured to only apply to items in a particular Department (e.g. Entree), both surcharges can apply to a sale, effectively surcharging items from each Department using a different rate.
To change the priority of a surcharge, press the "Change Priority" button on the left-hand side of the Surcharge window.
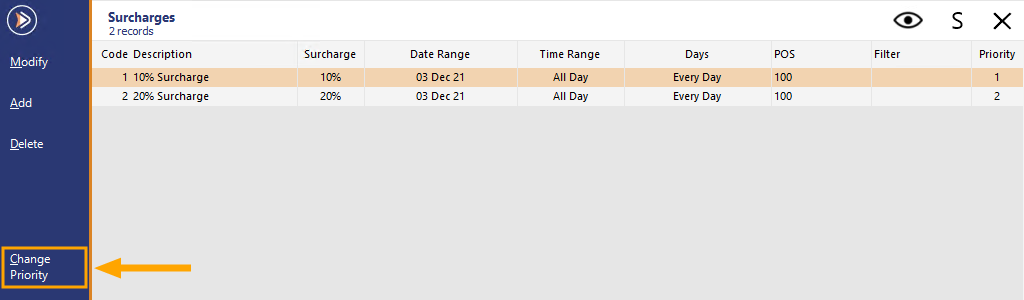
Arrows will appear on the left-hand side of the window which can be used to change the priority order.
The first two arrows are used to move the highlighted surcharge entry up or down in the list.
The last two arrows are used to move the highlighted surcharge entry to the very top or the very bottom of the list.
Use the arrows as required to rearrange your surcharges.
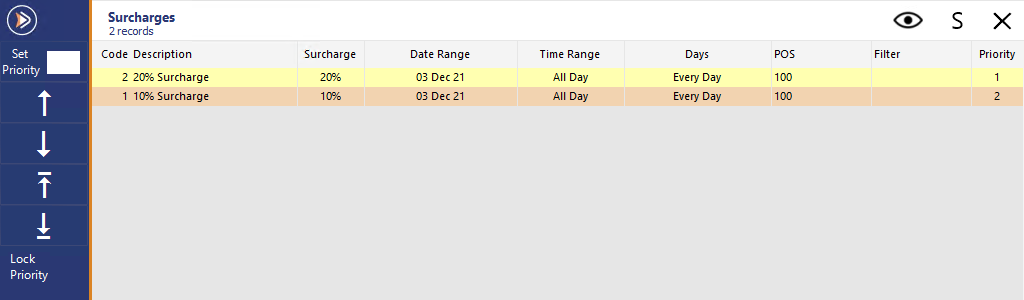
Once the desired priority order has been set, press the "Lock Priority" button on the left-hand side.

Go to Setup > Yes/No Options.
Promotions/Discounts Calculated Live
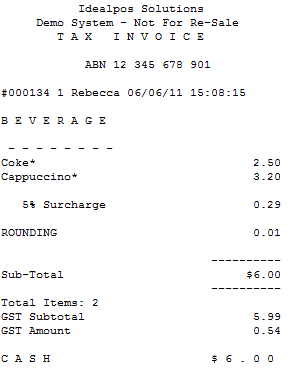
Select this option to show the surcharge on all items as they are entered onto the sale if the Surcharge is able to be calculated.

Tender Surcharges not apply to Tips
This option will prevent a surcharge from being added to a TIPS IN function.

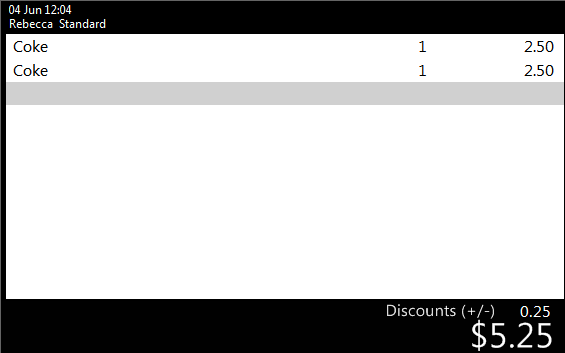
Select this option to show Allocated Discounts/Promotions on the POS Screen when the sale goes to Tender Screen.

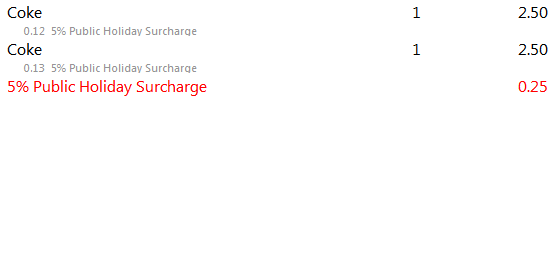
Print Subtotal Discounts applied to each item
Select this option to show the Surcharge applied to each item.
Option not selected|Option selected:

Clerks which are linked to a User will use the permissions set by the User profile.
Clerks linked to the Admin User profile must have their permissions set for each Clerk individually.
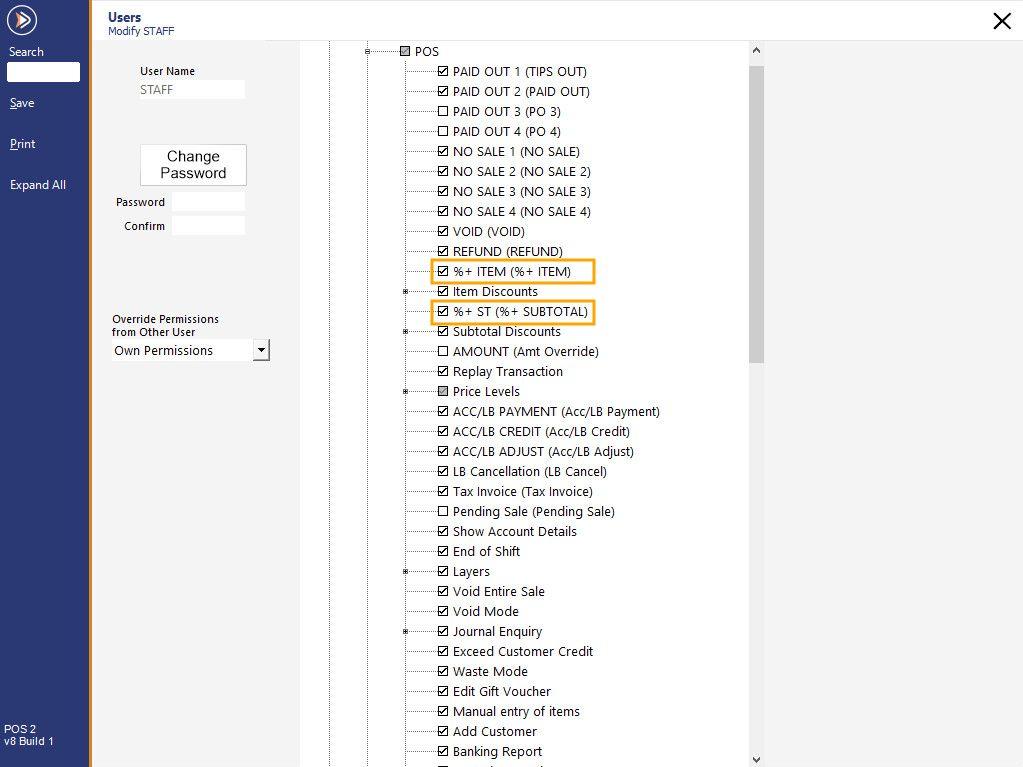
Go to Setup > Users > Modify > Clerk Permissions > POS > Select to allow (%+ Item) and/or (%+ Sub Total).
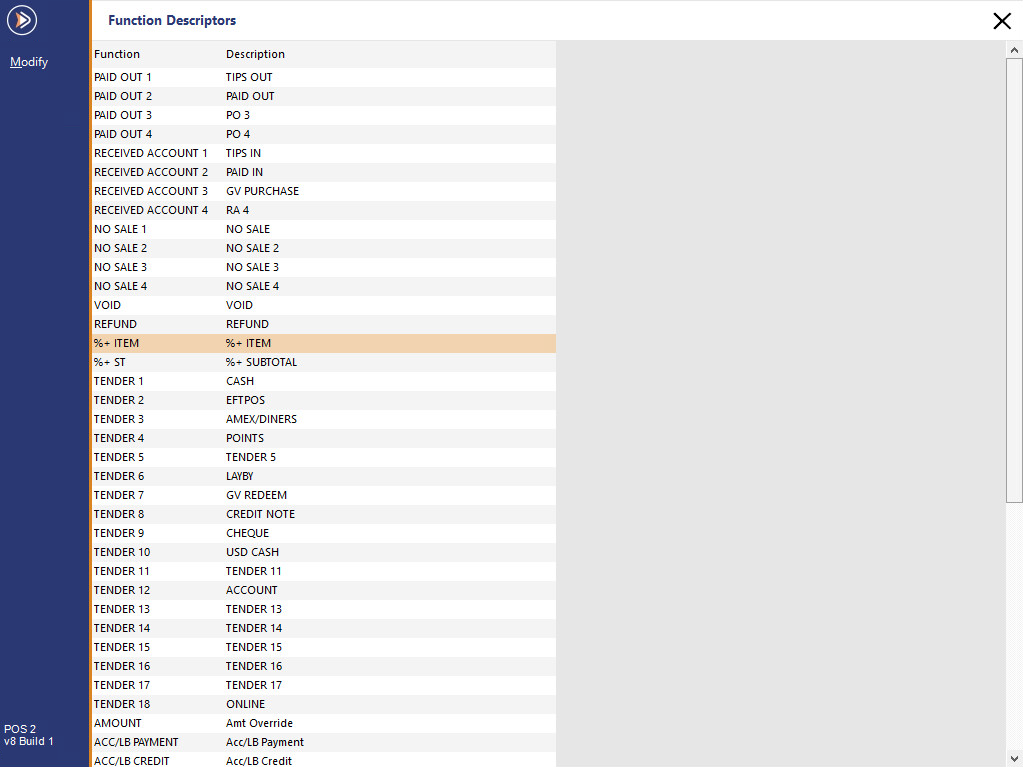
The Descriptions for the %+ ITEM and %+ SUB TOTAL Functions can be adjusted if required.
Go to: Back Office > Setup > Function Descriptors.
Modify “%+ ITEM” and “%+ SUB TOTAL” if you want to give them a different description.
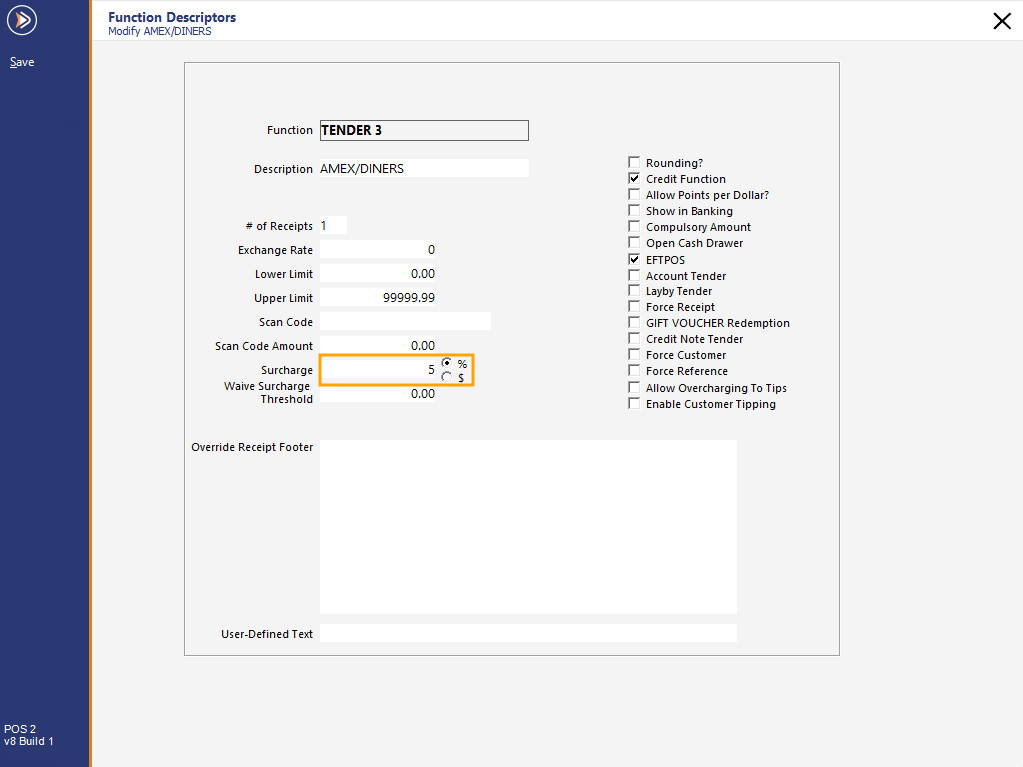
Surcharges can be set on specific Tender Types as required.
To set Surcharges on Tender Types, go to: Back Office > Setup > Tender Types.
Modify the selected Tender > Enter a figure as a % or $ amount > Save.
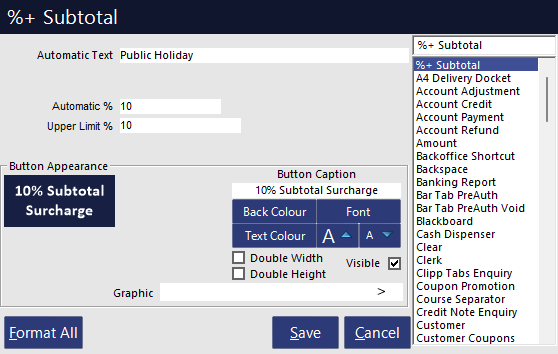
Go to Setup > POS Screen > Select Layout > Buttons.
%+ ITEM Function
Automatic %- This value will automatically be applied to the Item.
Upper Limit %- This value will not allow this buttons function to be applied above this limit.

%+ SUB TOTAL Function
Automatic %- This value will automatically be applied to the Item.
Upper Limit %- This value will not allow this buttons function to be applied above this limit.